Getting Started Guide
This guide is designed for new team members to get comfortable with the core features and navigation of our administration panel. By the end of this guide, you will be able to find, view, and understand the data you need to perform your role.
Logging In
Your journey begins at the login screen.
Access URL: http://wd-admin-web.webdevelop.ll:8085/admin/
Login: Contact our system administrator for VPN set up. Under VPN use the credentials provided by our system administrator.
A Tour of the Admin Dashboard
Once you log in, you will see the main Admin Dashboard. This is your home screen and starting point for all administrative tasks.
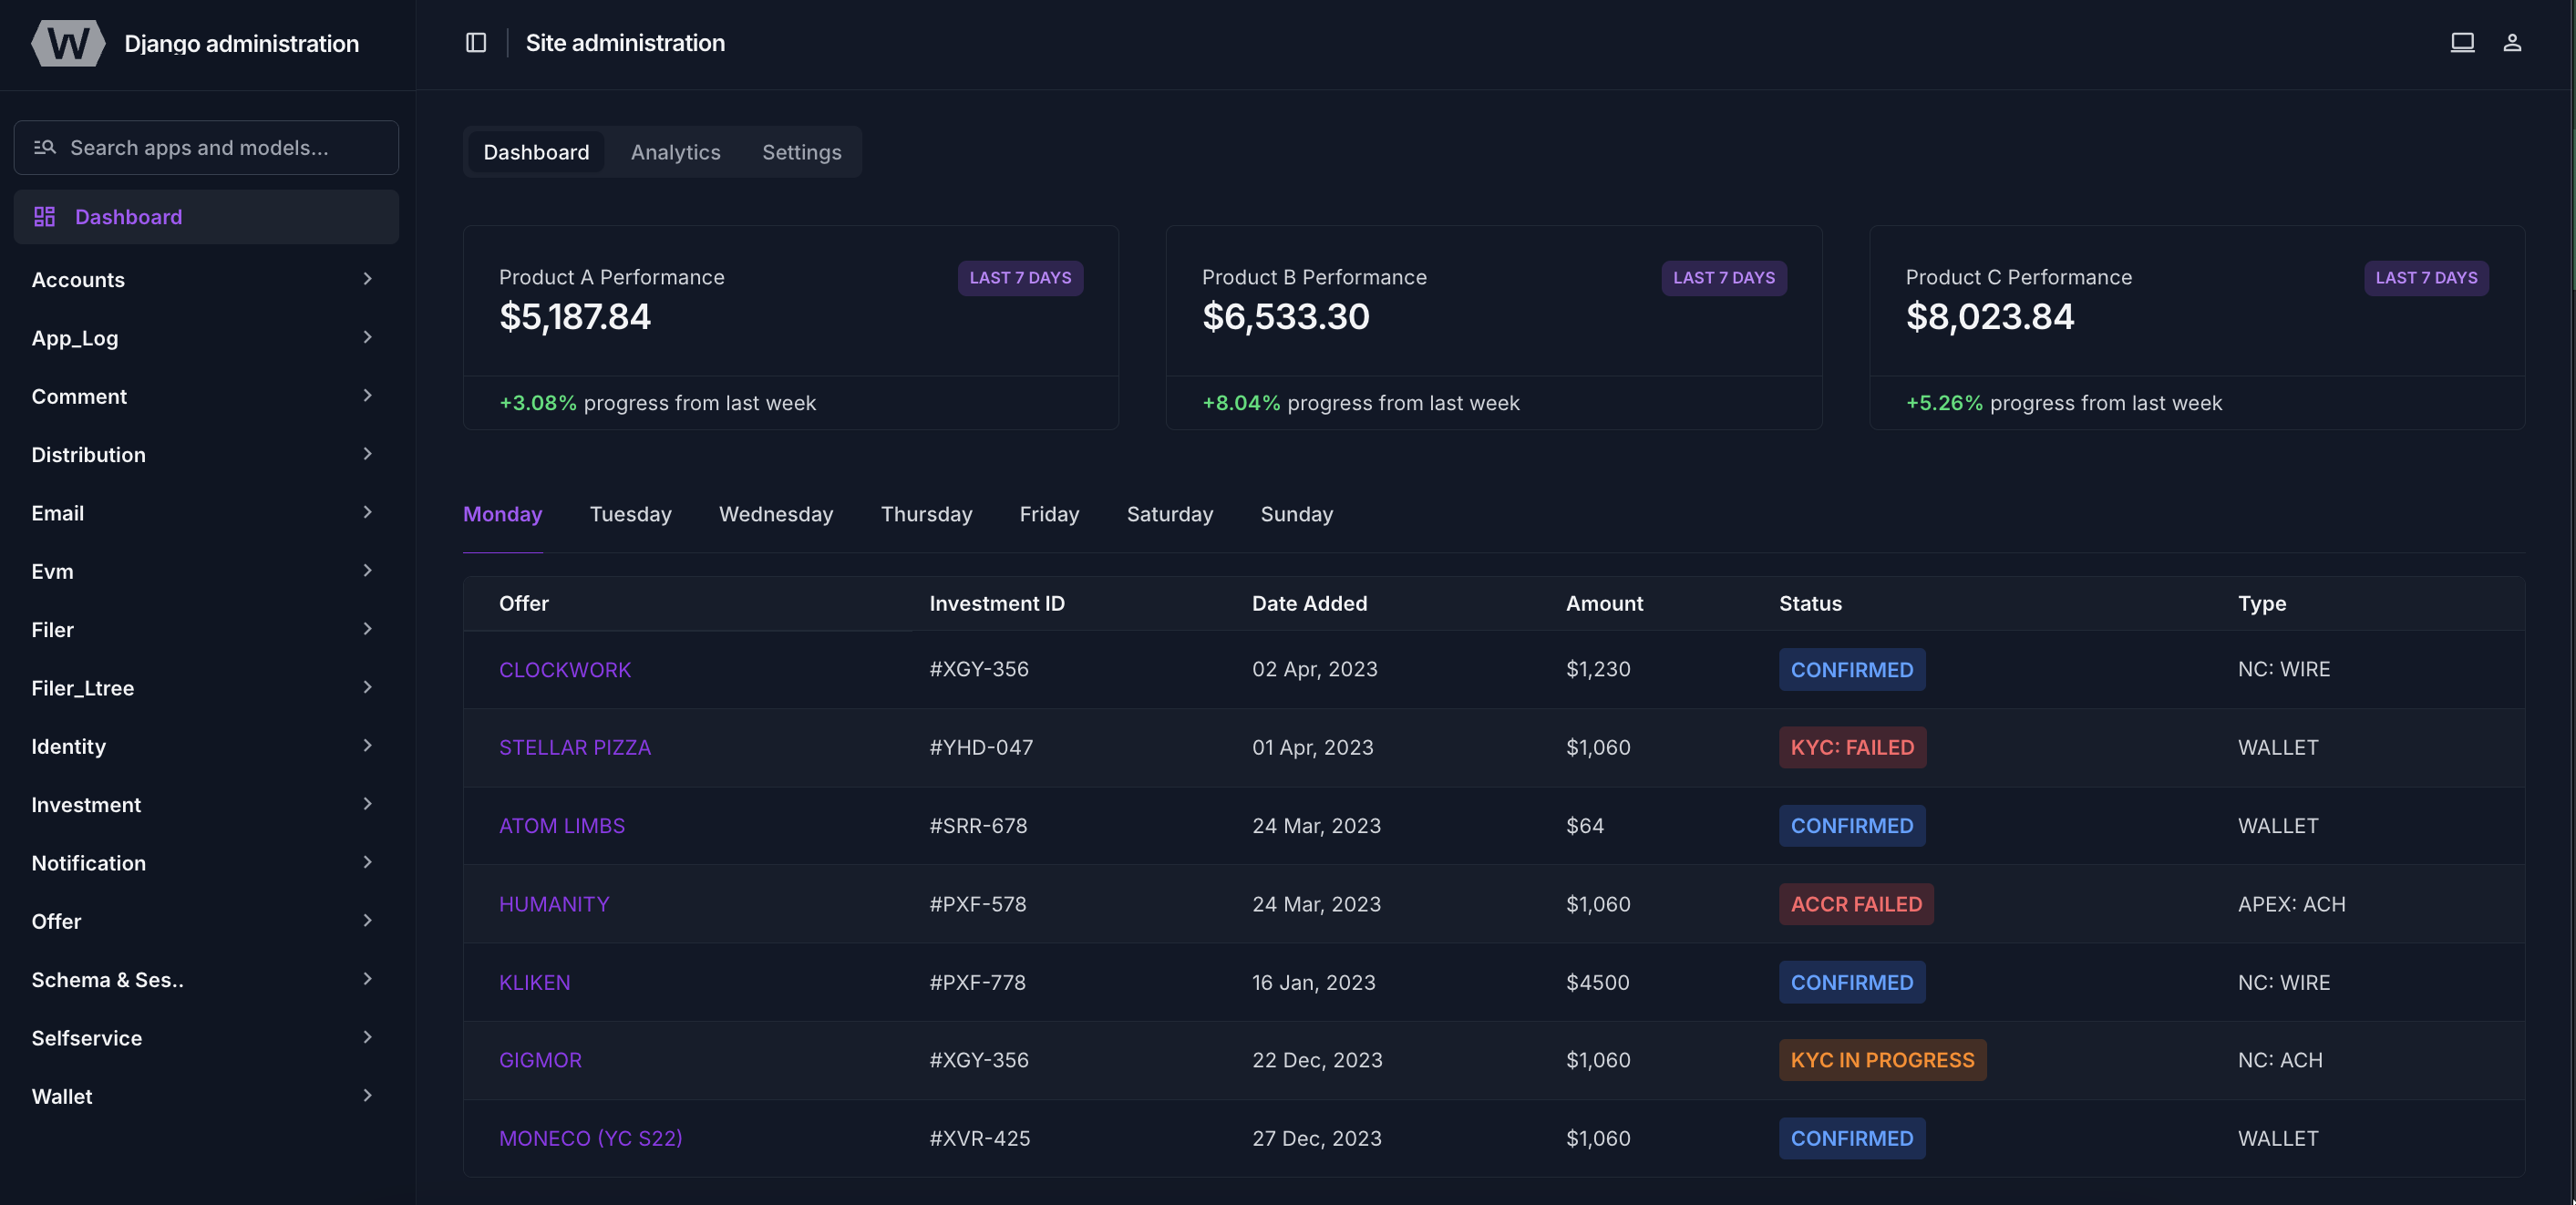
The dashboard is divided into two main areas:
The Navigation Sidebar: This is your primary tool for navigating the platform. Each link in this list—such as
Profiles,Offers, orInvestments—takes you to a dedicated section for managing that type of data.The Main Content Area: On this main dashboard page, you will see a list of all the data models you have permission to view, grouped by their function.
Core Interface Mechanics
The admin panel interface is consistent across all sections. Once you learn how to navigate one, you can navigate them all. There are two main views you will interact with.
The List View (How to Find Information)
When you click a link in the navigation sidebar (e.g., Accounts->Profiles), you are taken to its List View. This view displays all the records for that model in a table.
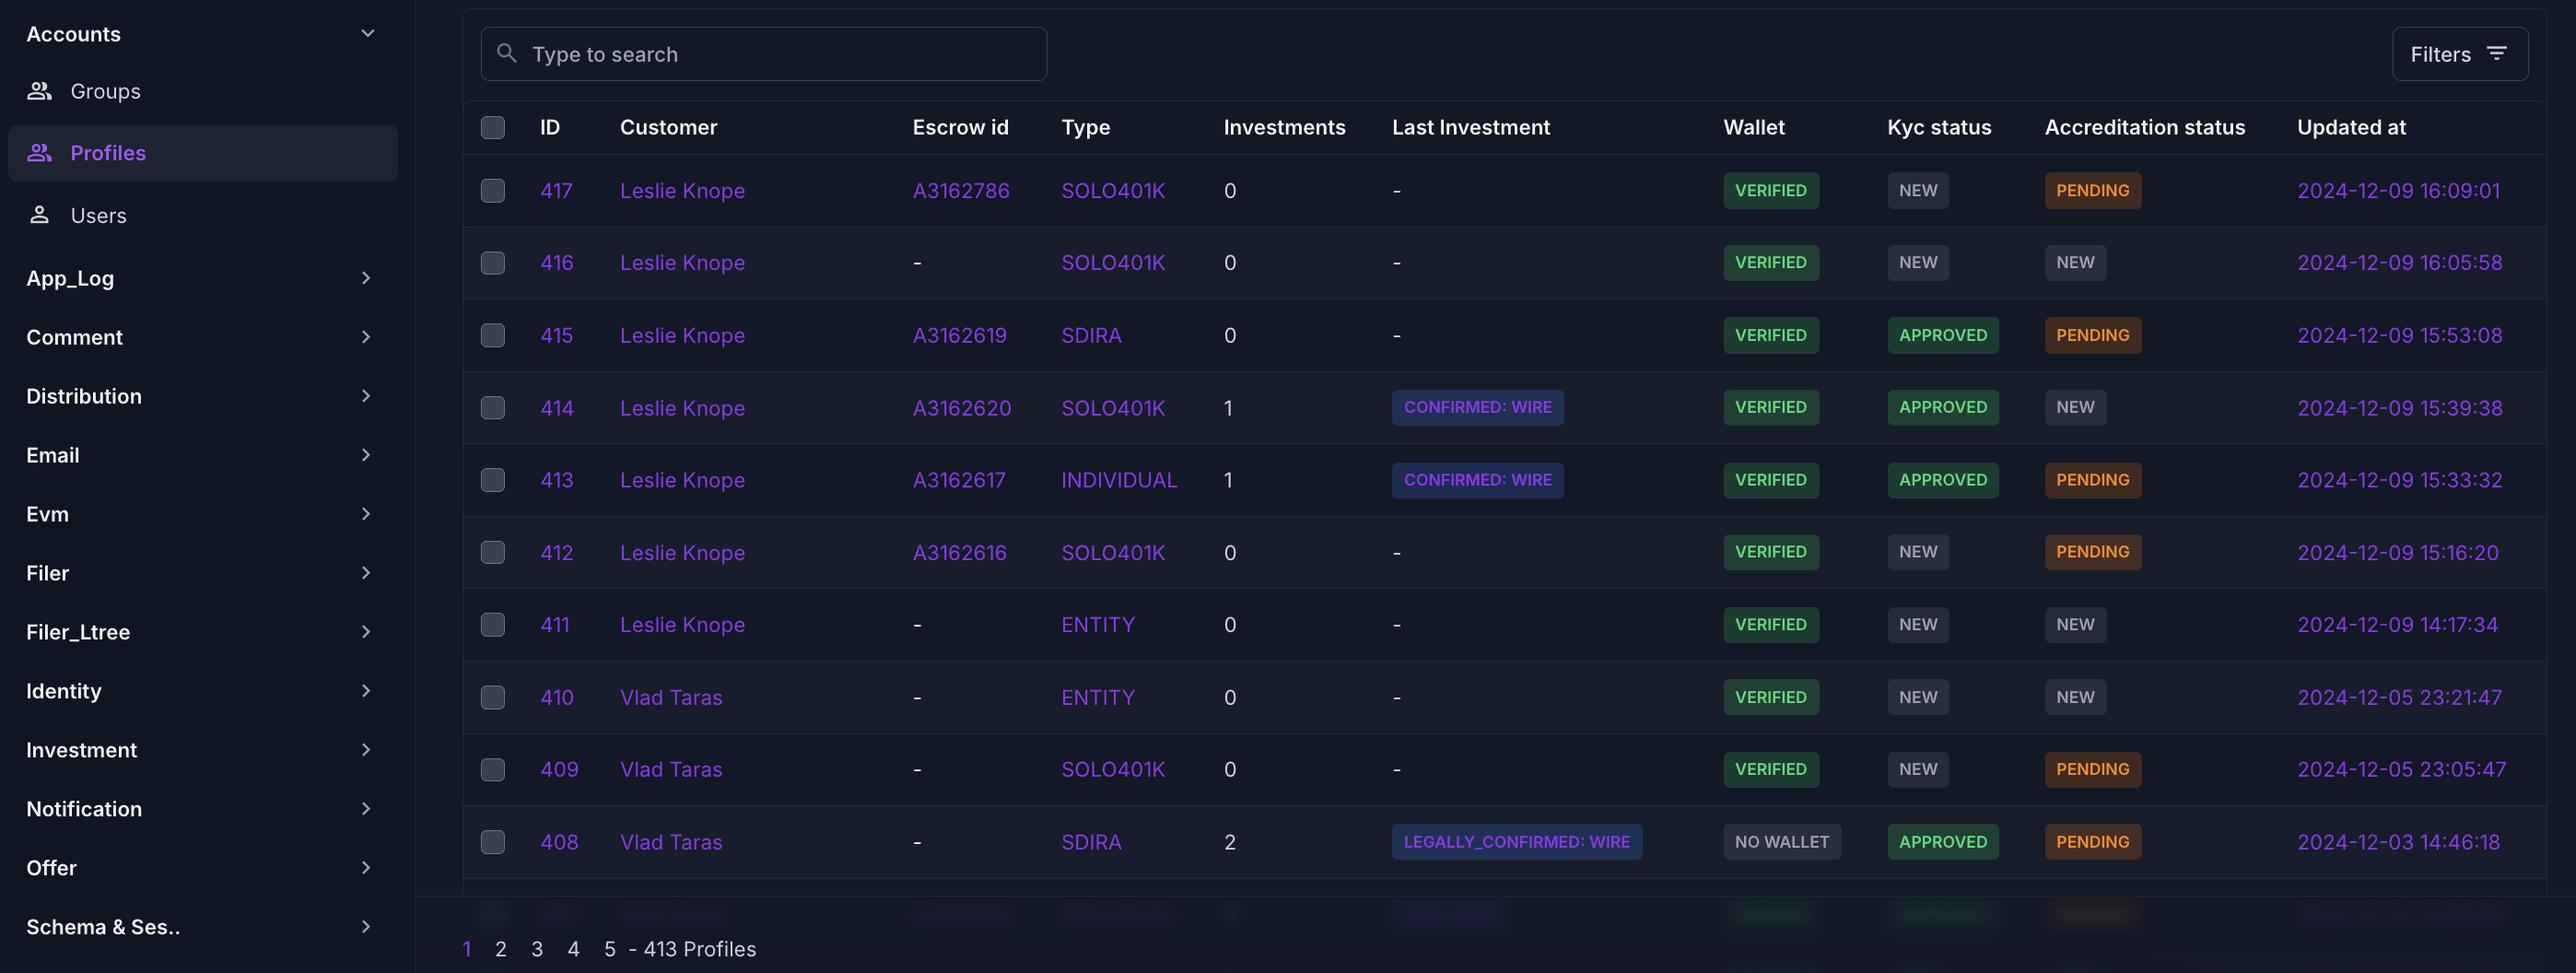
Sorting: You can sort the data by clicking on any of the column headers. For example, clicking the "Updated at" header will sort all profiles by date.
The Search Bar: Use the search bar at the top to find specific records. For
Profiles, you can typically search by name or email address.The Filter Sidebar: This powerful tool on the right-hand side allows you to narrow down the records shown. For example, you can filter the list to see only
Profileswith a accreditation-profile of "Pending."
The Detail View (How to View & Edit a Single Record)
When you click on a specific record from the List View (e.g., an investor's name), you are taken to its Detail View. This is a form that shows all the information for that single record and allows you to make changes.
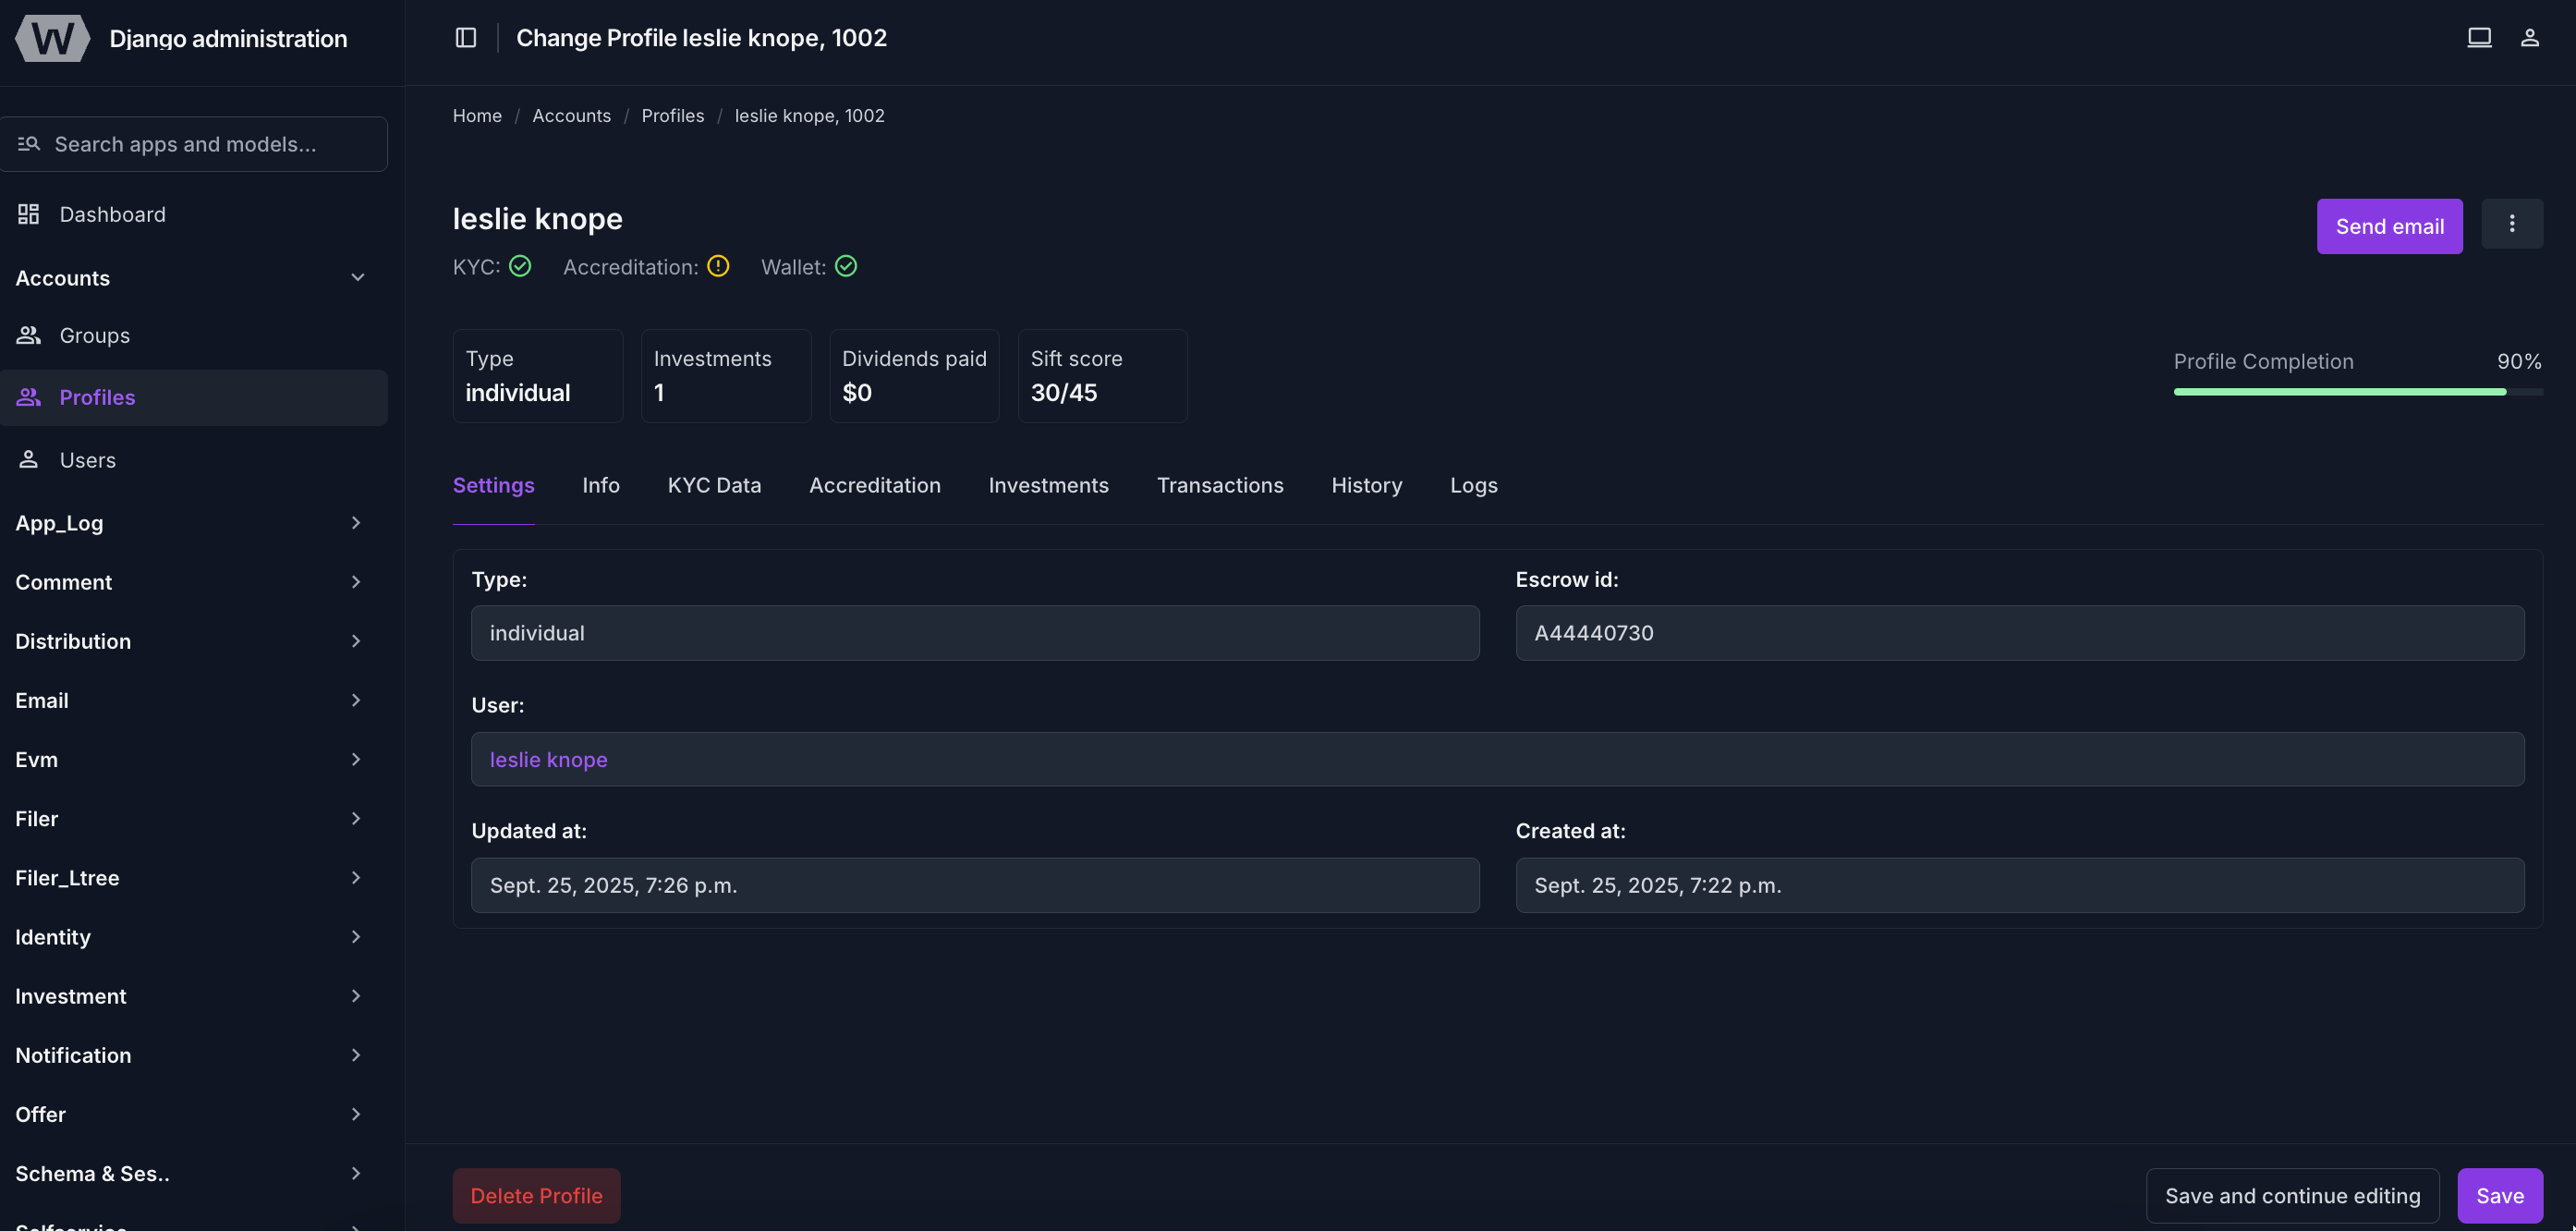
Fields: The form is made up of different types of fields, such as text boxes, dropdown menus, and checkboxes.
Required Fields: Any field name displayed with red asterisk is mandatory and must be filled out before you can save.
Save Buttons: At the bottom-right, you will find buttons to save your changes.
Savewill save and return you to the list view, whileSave and continue editingwill save and keep you on the current page.Delete Button: At the bottom-left, you will find buttons to delete your object. Before deletion the system will ask you for confirmation on confirmation screen with details about associated object.
History Tab: In the top-right tab section, the "History" tab lets you see a complete log of every change made to this record, including who made the change and when. It tracks actions made by the end users and the administrators.
Log Tab: In the top-right tab section, the "History" tab lets you see all logs associated with the record.
Other tabs: May vary based on the record type and shows appropriate fields.
Where to Go Next
Now that you are comfortable with the basic mechanics of the admin panel, the next step is to understand how all these data sections connect. We highly recommend reading the djadmin big picture next to understand the full lifecycle of our RWA platform.